Transition your old USB-Printer to a Network printer with scanning capabilities

If you are like me, you almost certainly bought a cheap USB printer for your immediate needs during COVID. I myself bought a Canon MG2500. It's a cheap, reliable and small printer. At the time of the purchase it had everything I needed to quickly print a couple of documents when required. Since I planned to use it only for myself, the USB only connection was not so much an issue, besides the occasional unplugging when I changed the height of my standing desk.

Fast forward to today... It's still here but is now desperately missing a ethernet port or wifi connectivity. Which makes myself feel like a printer server: "Can you print the Mail I send you", "Can you print the Whatsapp?", etc. Also, the integrated scanner was barely usable due to the flaky driver in Windows 11 and the amount of handling involved. For scanning I mostly used the OneDrive app - with mixed results.

Network printers with scanning capabilities offer several advantages over USB printers, including the ability to print from a variety of devices and share documents easily. With the help of a single-board computer (SBC), it's now easier than ever to transition a USB printer to a network printer with scanning capabilities. In this article, we'll explore the process of setting up a network printer with scanning capabilities using an SBC, so you can print and scan from any device in your home or office.

Equipment Decisions

I was using my existing Canon MG2500 printer. It can print in bw and colour and does it with a decent speed. Additionally it has a scanning unit, which I wanted to share over network as well. 

Single Board Computer (SBC)

While a Raspberry Pi would certainly fit to our needs of a printer/scanning server, it's quite bulky, not easily available, and too expensive. I decided to order a rather small SBC: the NanoPi NEO3 with 2 GB of RAM. It goes for about USD 38.00 for the 2 GB version with a case. It supports USB3, Gigabit Ethernet, and is based on the Rockchip RK3328, which is ideal for such applications.
In addition to that, you'll need a MicroSD card, network cable and USB-C Charger. The power consumption of the NanoPi NEO3 ranges from 4 to 5W, a charger with 2A @ 5V should be enough.

Installing the Operating System

Flash the image

Documentation based on NanoPi NEO3 - FriendlyELEC WiKi, flash the image according to the documentation. I was also using the Win32DiskImager, available from 

First Login, Change Password and Updates

The image is configured to use DHCP. The device will get an IP automatically. Since it does not have any display, it cannot show it to you. To find the device in your network, you have two options

  • Check your router and find the device in the DHCP leases list
  • Use a Network Scanner, which finds all devices by ennumerating all possible IP addresses

I'm using Advanced Port Scanner – free and fast port scanner (advanced-port-scanner.com) to find the device, which was found under the name "NanoPi-NEO3". 

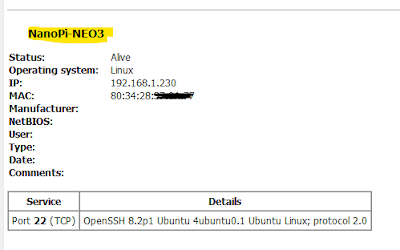
Found device in local network yay!

It has SSH enabled, and comes with two logins, as below. For both you should immediately change their password.

  • Guest Login: User pi, Password pi
  • Root Login: User root, Password fa

Change Password

To change the password, you can login to the root account and change the password for both users. See below:

sudo passwd root sudo passwd pi

Updates & Nano Editor

Update and Upgrade, should always be your second command after changing passwords. We will also install the plaintext editor nano, which makes it easier to edit files than vi.

sudo apt-get update sudo apt-get upgrade sudo apt-get autoremove sudo apt-get install nano

Change from DHCP to fixed IP

As the device becomes a server, we should assign it a fixed ip. This can be done by editing the file /etc/network/interfaces.d/eth0

sudo nano /etc/network/interfaces.d/eth0

Here is an example with my network configuration

auto eth0 allow-hotplug eth0 iface eth0 inet static address 192.168.1.15 netmask 255.255.255.0 gateway 192.168.1.1

If you are not sure what values to be used for netmask or gateway, they can be found it your local network configuration.

Ideally you restart your SBC now, to verify that all the IP changes are applied and you can still connect to it.

sudo shutdown -r now

It should not take more than 1 min until you can connect to the device again.

Turn it into a printer server with CUPS

CUPS Installation

From Set Up CUPS Print Server on Ubuntu (Bonjour, IPP, Samba, AirPrint) (linuxbabe.com). In a nutshell (please refer to the article for more details)
  1. Install cups sudo apt-get install cups
  2. Start cups with sudo systemctl start cups
  3. Enable auto start with sudo systemctl enable cups
  4. Adjust configuration in /etc/cups/cupsd.conf
    1. Enable Browsing, turn Browsing Off to Browsing On
    2. Change Web interface binding from Listen localhost:631 to Port 631
    3. Add Allow @LOCAL to the web directories /(root folder) and /admin
  5. Restart cups  sudo systemctl restart cups
After all this steps, navigate to the url http://192.168.1.15:631 and you will see the CUPS web interface.

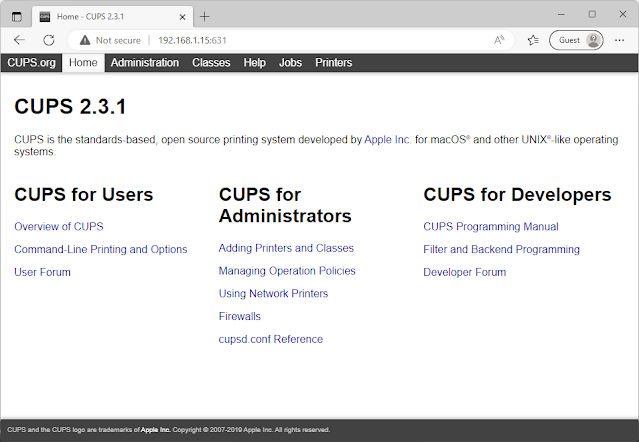
Yay, CUPS is ready to work for us!

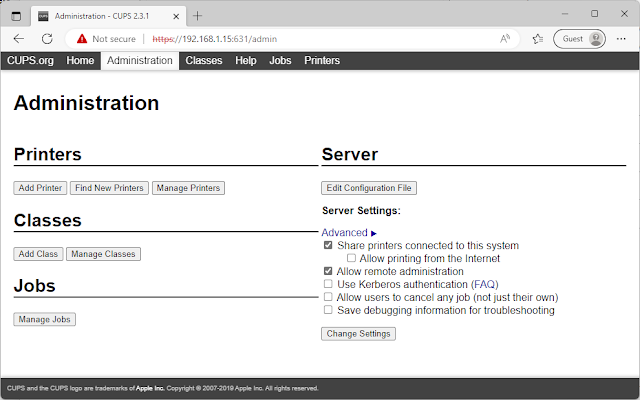
CUPS will almost certainly not automatically detect your printer. I order to make that happen you need drivers.

Install Drivers

It could be challenging to find drivers for your model. Sometimes, printer manufactures do support Linux, sometimes only for specific architectures. In the case of the Canon MG-2500, the official printers to not support ARMx64, which might work for you.

Thankfully there is a great community which has developed 3rd party drivers for linux. Its available under OpenPrinting. To check, if there is a package available, you need to know your printer name, as it is shown to the system. 

Find your Printer Name

First of all, unplug and turn off your printer and wait a couple of seconds before you turn it on / connext again via USB. This will make it easier later to find the correct entries in the logfile.

We will inspect the log messages related to new devices attached to the system, by using the command sudo dmesg.

A sample output is below. It confirms that the printer identifies itself as Canon MG2500 series. Hence this is the name we will be looking for drivers.

auto eth0 [ 498.977794] usb 4-1: new high-speed USB device number 2 using xhci-hcd [ 499.124867] usb 4-1: New USB device found, idVendor=04a9, idProduct=176d, bcdDevice= 2.03 [ 499.124879] usb 4-1: New USB device strings: Mfr=1, Product=2, SerialNumber=3 [ 499.124886] usb 4-1: Product: MG2500 series [ 499.124892] usb 4-1: Manufacturer: Canon [ 499.124899] usb 4-1: SerialNumber: 840A8C [ 499.224748] usblp 4-1:1.1: usblp0: USB Bidirectional printer dev 2 if 1 alt 0 proto 2 vid 0x04A9 pid 0x176D [ 499.225500] usbcore: registered new interface driver usblpou are not sure what values to be u

A quick search on the page reveils that there is a driver which at least supports a great variarity of Canon printers. Even though mine was not listed, it was supported.


To install the GutenPrint Drivers, use the command sudo apt install printer-driver-gutenprint. Other than Canon, they also support many printers from Epson and HP.

For HP printers, there might be another package you will need, called hplip. To install, use sudo apt install hplip

As soon as the drivers are installed, you can use the web interface to install the printer into CUPS. Navigate to https://192.168.1.15:631/admin/ (change the IP accordinly). You will have to login using your root account and password. 

Home page of the CUPS administration

Select the option "Add Printer" to start the add printer wizard. In the first page of the wizard, you will find your printer (see below)

Wizard to add a new printer to CUPS

Feel free to customize the name of the printer, or change default settings. You can always change this settings later again. After completion, navigate to the printer maintanance and select "Test Page" from the menu to confirm that everythins is working as expected.

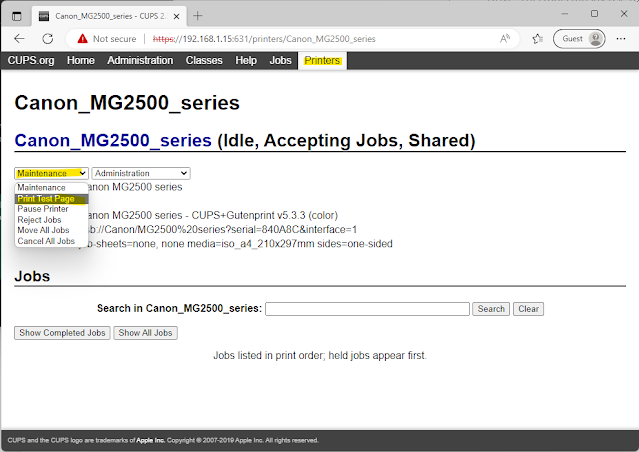
Print test page option for newly installed printer

After completion, your printer is ready and available in the network and can be found from any major devices and operating systems (Windows, Mac, Android, iPhones). Typically you go to their settings and find new printers. They will install automatically. For mobile phones, you can select from the print dialog to print on network printers, just make sure you are in the same WiFi.

In case it cannot be found

It could be that mDNS is not properly enabled or started. If you cannot find the printer from some devices, please make sure the the avahi-daemon is properly installed and started.

sudo apt install avahi-daemon sudo systemctl start avahi-daemon sudo systemctl enable avahi-daemonallow-hotplug eth0

Add Scanning Capabilities

We are done with printing - but what about scanning documents? There are multiple workflows possible, for instance
  • Scan to E-Mail
  • Scan to Network share
  • Scan to Scanner Web UI
It's important to know what your scanner is capable of. Does it have a scanning button? If no, you almost certainly cannot trigger the scanning process from the device, which makes the first two workflows rather useless.

In this small guide, we will therefore focus on a UI triggered scanning process. The great thing about scanning in Linux is the separation between backend and UI. While there are many frontend applications (desktop, web, console) available for your scanning workflows, they all rely on a single backend. This backend abstracts the communication to the scanner and provides a simple (technical) interface to work with.

Let's install the backend: SANE

SANE stands for Scanner Access Now Easy. It can be installed very simple with:

sudo apt install install sane

After that, you can check if your scanner was found

> sane-find-scanner # sane-find-scanner will now attempt to detect your scanner. If the # result is different from what you expected, first make sure your # scanner is powered up and properly connected to your computer. # No SCSI scanners found. If you expected something different, make sure that # you have loaded a kernel SCSI driver for your SCSI adapter. # Also you need support for SCSI Generic (sg) in your operating system. # If using Linux, try "modprobe sg". found USB scanner (vendor=0x04a9 [Canon], product=0x176d [MG2500 series]) at libusb:004:006 # Your USB scanner was (probably) detected. It may or may not be supported by # SANE. Try scanimage -L and read the backend's manpage. # Not checking for parallel port scanners. # Most Scanners connected to the parallel port or other proprietary ports # can't be detected by this program.

The response is a bit verbose and you might miss the fact that a scanner is found on the line that reas "found USB scanner (vendor=....)".

You can test the scanner with the following command

scanimage > image.jpg --format jpeg

Your scanner should move and after the scan process has completed, there is a file in your system containing the scan. This is probably not so elegant, so I went for an addditional frontent.

Let me introduce ScanServJS, a simple web-based interface for SANE!


And the Frontend: ScanServJs

Scanserv is a NodeJs application and is not available though the apt package manager. The author provides a simple install script on his website, but there is also a manual installation possible.

I have used the automated installation script

curl -s https://raw.githubusercontent.com/sbs20/scanservjs/master/packages/server/installer.sh | sudo bash -s -- -a


And access it via http://192.168.1.15:8080. Its fantastic and just works! Some of the features that I like the most
  • Scan to PDF including text extraction with Tesseract!
  • Black & White, Greytone, Colour modes
  • Preview to set the correct margins
  • Download previous scans / delete them

Conclusion

Hope this guide helps you to upskill your USB printer/scanner. I was not expecting that this would be that easy, no major roadblocks were found. I'm using this setup now for multiple weeks and so far there was not even a single issue.

Happy Printing!

Comments

Popular posts from this blog

Home Assistant in Docker with Nginx and Let's Encrypt on Raspberry Pi

Use Bodmer TFT_eSPI Library with PlatformIO

Migrating from Arduino IDE to Visual Studio Code to PlatformIO